BSides Cape Town 2019 Making a badge
Table of Contents
- The making of my first badge (firmware)
- What do I want to accomplish
- What did I get right
- What did I get wrong
- Where to next
- Links
The making of my first badge (firmware)
This has been a long time in the making and it’s a straight follow on to my last blog about making a simple hardware console.
Flash forward 8+ months later, we’ve had the BSides Cape Town 2019 conference and I think we made something quite great hardware wise, and I hope you enjoy the software too.
To move onwards from the awesome BSides 2016 badge, which is where all my hardware hackery started, we’ve gone with a colour screen, a dual core processor and touch buttons, as well as a GIANT battery to power it all, we also have a custom designed 3d printed case for it too! So it’s an all out hardware geek fest.
What do I want to accomplish
I want to run through the hardware and software that make up the project, the goals I had and achieved (and some I didn’t) as well as what my hopes were for it.
Hardware
This is probably the easiest place to start since everything gets based on this going forwards.
The components are

- ESP32 processor.
- This is a dual core 240mhz, 380kb memory, 4mb rom processor. It is super fast, and has Bluetooth and Wifi built in! It doesn’t have a floating point unit, but those type of calcs can be done via the toolchain and Arduino libraries, otherwise you can do fixed point math, like I did for a number of performance reasons.

- 1.3 Inch 240x240 IPS Display
- This display was a real find, it’s price and resolution are not easy to come by, one of the challenges in the project was actually pushing out all those pixels, we couldn’t actually do full 16 bit colour, which the screen supports, because of the framebuffer it would have required. I do feel the 256 colour palette has some charm to it though.

- Custom PCB
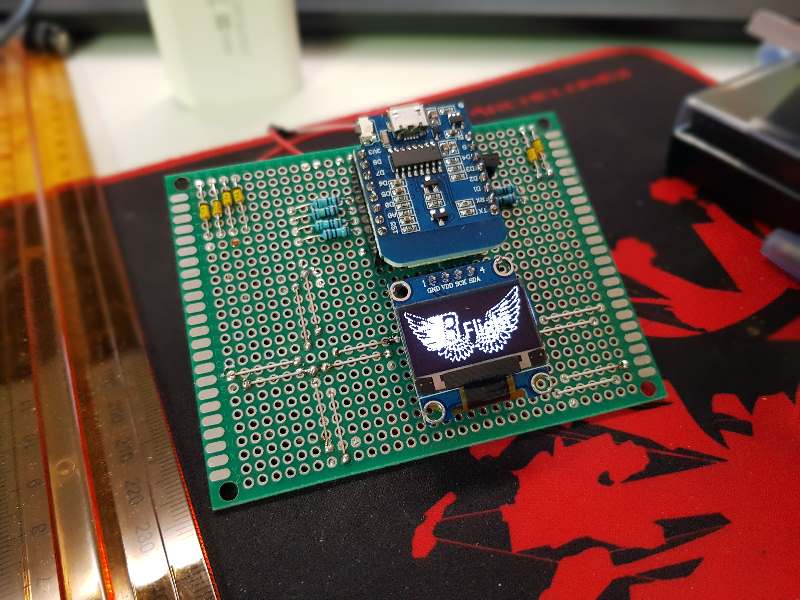
- The PCB is designed to fit all the components (Charging circuit, USB, battery power) as well as the touch buttons

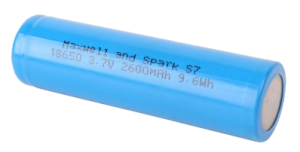
- A 18650 Battery
- This is considered the most standard battery in the world, it’s the same one as is used in Teslas! So you can feel a bit like a part of the future, just having one of these in your possession, I think it’s a 2800mah battery, but time will tell, literally on the day :)

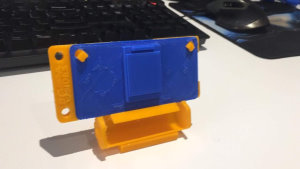
- 3D Printed case
- I’ve always noted how people are sometimes reticent about touching the badges, really getting their hands into it and playing with it. Having the case will hopefully address that, as well as hopefully give the badge a much more finished product feel.
Goals
I was very keen to put something out there to show what the hardware is capable of, something to show how powerful the CPU is and how great the screen is. That to me was some sort of game / tech demo.
Thankfully the game won out and I’ve put together a single player game which shows quite a bit of the capabilities of the hardware, as far as I could push it and how much you should be able to do with it.
I also wanted this to be as accessible as possible, part of that was tooling and libraries used, and another part was making it as cross platform as possible.
A big goal is to have people go away, strip this badges software back to the core and make it do some single thing much better than I did here. Whether it’s fleshing out the BT GamePad functionality or rolling out a new single player game, making a mesh network multiplayer game with adhoc capabilities, those would all blow me away.
Mostly I will go away happy if people see the possibilities of the hardware and maybe it ignites some passion in them to go and explore and learn like I did.
After about 2 years of on and off upskilling for myself, I can highly reco mend anyone who is interested, give this a go, it’s not untenable and unreachable. You just have to go for it.
Firmware
The badge firmware started on a whim after talking to Mike (Elastic Ninja) about it on and off for a couple months, I had a firmware for similar hardware and it worked with a screen, I figured how hard could it be to port and write some custom code for. It turns out, relatively straight forwards to start, but in the end massively time consuming to finish :).

I had written the ESP8266 Game On engine for the similarly named ESP8266 with a black and white SSD1306 screen. Since I had written it to run on Windows, Linux, Web browser and the hardware itself, I figured writing one more version of it, wouldn’t be that hard. I got the initial version up (black and white) on the ESP32 in about a day. That was the bit that sucked me in completely, after that I was hooked.
Changing the code base to colour, took a bit of hacking and working out and after that, for acceleration, I dropped the Web version and the Console Text versions as well as the ESP8266 version and opted for only SDL (A cross platform graphics library) for Windows and Linux, and the ESP32 hardware.
I ported Asteroids over quite early on and that was a big win from a tuning point of view, getting the graphics right, getting the input working tightly, rounding it all off.
I implemented a menu early on, so we could have some ability to work on multiple things in the same code base without treading on each others feet as well as the fact we were going to need it in the future.
I also wanted something interesting on the main menu and found Doom Fire documented by Fabian this gave a great feel to the menu.
We wanted to have some sort of competition on the day, so adding a JSON library for saving and loading local scores was implemented, then I found a JSON server which would be up to the task of aggregating our high scores. Plugging that in over WiFi took a bit of time, but the pay off was great, we have a leader board page we could display as well as letting the badges download the high scores locally for viewing the top 5 scores.
After that the focus moved to the single player game, the idea was a take away from an idea I had for a previous badge as well which had never got an official hardware release. The journey to the conference, which morphed into something to match up to the theme of the conference “Everything is broken”, the idea that followed was that the servers had been compromised and you had to go to the office as remote access was compromised and get the security keys for your server and then re-secure the hardware.
This theme tied quite nicely into a few prototypes I had knocking around already. I started with a (very) simple driving game, you’re in a bakkie and you have to dodge taxi’s on the way to the office. The office is in Cape Town, so that’s a drive towards table mountain (from an impossible angle, but hey artistic license). The feel of the game was meant to match a crappy version of F1 on the NES, but I felt like I ended up with that and a mash of Mortal Kombat 1 type graphics with the real pixelated graphics I was using.
The second scene is now in the office, looking for the security keys. I had implemented the code for a Raycaster (think Wolfenstein) from some fantastic tutorials by Lode for the ESP8266 and porting the engine over and upgrading from black and white was great. Instead of using a ton of textures, I just went with colour bitmasking (taking away or adding certain colours to an existing bitmap). Adding the floor and ceiling add a lot visually to the scene. I was originally planning on going with a randomly generated level, but in the end I settled on a static level to store it in ROM and save precious memory.
The 3rd and final scene, interspersed with the walking around the office scene, is the virtual reality scene, where you dive into the computer and go to secure the access key. This is one of the pieces of code which I fought the hardest for, it’s a Voxel landscape and used two textures for the land and the height map. It also has a LOT of floating point calculations and took a good deal of time to optimise, I played with a LOT of ideas for speed and performance (interlacing, lower resolutions, different viewing angles), but mostly it just took tightening up loops and applying well established optimisations on the process.
It was round about this point that the dream of remotely updating the ROM started fading, Mike hadn’t implemented any code himself yet and I was running at 98+ % space usage. This was a bit too high to keep pushing forwards. To update the ROM over the air (OTA) you have to use 2x whatever you allocate to the ROM, so for us that was 1.9mb x 2 for the ROM and 190kb for storing data like the JSON saved configs.
One build setting later and I had almost another 2mb free. I went a bit crazy and implemented compressed JPEG loading, QR Generators, changed all my binary encoded graphics to JPEGs where it made more sense (full screen images) and added a few easter eggs, which ate up space. Amazingly most of the space being used was the Bluetooth Stack and the Wifi stack, both of which we needed. So all the new features and graphics, only took me up to 2.1mb.
I played around with a concept of a Bluetooth controller for quite a while, it wasn’t the best documented part of the Arduino framework, but I managed to scrape together a GamePad HID Profile and the code to start up and bind. I was bummed that this never panned out on Windows, but it works on Linux and Android… hopefully MacOs too (untested at this point).
Here's a reminder that we have very awesome badges this year. Plus, bonus feature, you can use it as a wireless controller for your phone 😏
— BSidesCapeTown (@BSidesCapeTown) November 7, 2019
Tickets: https://t.co/05A2HhQzQD
Track 2 Schedule: https://t.co/4LnvWGaKtx
Track 1 TBA!#bsidescpt #bsides #infosec #siliconcape pic.twitter.com/EaTwuPyCv6
Then the setup screen went in, I added the Name setup screen, Wifi scanning (this was meant to turn into Wifi setup on badge), Rotate (because the lanyard holes on the badge became the mount points for the case, and thus orientation changed), and the firmware update which turned into a joke screen after the OTA was dropped and finally a screen just to have the location of the repos pertinent to the code for the badge.
After those big features were in, it was time to add an about screen (which I created a sine scroller for, another classic demo effect)
I got a last hurrah in as well, which was an idea of whether I could or not, that was the Achievements, I am so happy with how fast this was to implement and how great it is actually adding achievements with like 5 lines of code.
Finally there is still a lot of debug code on the badge, I could have taken this out, but actually still find it quite useful, quite often, so I have left it in. There’s the FPS / RAM / Heap Corruption screen. The input debug screen and added during the rotate function testing, the FPS output over serial, I always wanted to have a FPS graph on my PC from the badge.
What did I get right
Cross platform
This was a major win for any new feature going in, being able to debug locally on my desktop allowed me to iterate through and implement a lot of things I would have never had patience for any other way. The Raycaster, Texture mapping and Voxel landscape would have been impossible to do without that.
Massive big up to those old school NES programmers who literally had to burn assembly onto a ROM to see their code running!
There was a scenario when I worked out I had a memory leak on the badge and for life of me I couldn’t find it in the code. I realised that I probably had the same leak on Windows but it wasn’t apparent because of the GB’s of RAM I had vs the 380Kb on the ESP32. I remembered way through the fogs of time a tool called Valgrind, I didn’t even bother trying to run it on Windows, I fired up my Linux machine, grabbed Valgrind, grabbed the latest code and ran it via Valgrind. I helped me track down the bug in hours. It was one of the most common mistakes in programming, off by 1 error on the screen buffer and some other minor bugs that eventually ate up all the RAM.
Screen speed
There was actually a worry early on about getting the screen up to speed, and initial tests were showing under 10fps for blank full screen updates.
Thankfully with a really fast library TFT_eSPI we were able to eek out a lot more speed, and wrapping up some calls, using the screen buffer and a fast lookup table for converting to 16 bit from 256 colour and blitting to the screen helped a lot. I also added RLE encoding to the screen so that consecutive same colours are done in one write.
Custom font
Because of the cross platform nature, I decided to roll my own font, which turned out great, it worked cross platform without issues and eventually benefited some great optimisations writing directly to my screen buffer and getting almost zero overhead for a screen full of text.
What did I get wrong
Memory management
I kept writing prototype code with global variables for the demo’s, there was no real benefit implementation wise, but this meant that when I start adding all the code into a single project I was using most of my RAM for global variables that I was only using one set of at a particular time, refactoring this took way longer than if I had just done it right at the start. Changing from a struct to a struct pointer is way easier than sorting out randomly using global variables throughout your code.
Library expansion / Headers
The headers in the project are a mess. The way the framework expanded during the project was a little hodge podge, and features were added as needed, this was a big pain getting things working sometimes and the Arduino IDE / Tool chain does have some issues, my favourite was not being able to include cpp files which are in directories, the errors you get are really unrelated to this.
The Bluetooth / Wifi not being cross platform
This is one of my biggest regrets, but probably neccessary on some fronts. I wish I had the Wifi as a first class citizen of the framework, but instead quite a few portions of the code are littered with #ifdefs that I was hoping to contain only to the platform files.
Documenting the goals earlier on
This was a bit of a problem around maintaining velocity as I got further and further into the project. There is a lost month somewhere where I couldn’t work out what to do and just lost all ability to write code towards the finished product, thankfully I did write up some goals and outlined my way to the finish line and then started nailing points off 1 by 1.
Where to next
Interestingly I’m quite keen to do most of this again, but more focussed on the simple hardware and framework side of things for a portable hackable game console.
I believe the ESP32 GameOn framework possibly has a future in the embedded space, but it will need a rewrite using what I’ve learned from this experience.
I would love to redo the platform files, redo the game framework and make sure to hide all the platform functions from the user and only expose easy to use, well thought out functions as well as the generic output and input mechanisms.
While I did my best to separate the resolution out the code, I did eventually start taking short cuts in a lot of places, I’m not sure that I could take that resolution lock in out and not use up too many resources on it, but it would be fun to try.
With Visual Studio Code, Docker and Emscipten, I have a plan around a portable self contained development environment tool chain which I would love to explore. I think there’s also some legs in seeing about allocating a heap of memory at start up and managing that throughout the life cycle to see if I could make sure we don’t break memory constraints on the PC version as well, and something to do with CPU cycle counting.
Is this the end
Probably for a while, but Thank You for reading this far, I hope you had some fun and hopefully gained something from the experience, if you would like to know more about any aspect of the project, give me shout and lets chat.

